
Choosing the right Spindle Hub Bearing Assembly is not a matter of matching dimensions alone. It requires a careful review of load, speed, heat, sealing, and installation conditions. A bearing may fit the spindle and still fail early. That mistake is surprisingly common.
Bearing authority Tedric A. Harris described a bearing’s purpose as “to support a load while permitting relative motion.” His observation is simple, but it guides practical selection. The assembly must carry radial loads, absorb cornering forces, and tolerate road vibration. For trailer, agricultural, and automotive applications, technicians should also check hub geometry, axle compatibility, preload requirements, and manufacturer specifications.
Start with the operating environment. Dust, water, mud, and temperature changes can attack the lubricant and raceways. A robust seal helps, but it cannot correct poor installation. Look for the correct internal clearance, load rating, grease compatibility, and corrosion resistance. Confirm whether the unit uses tapered roller bearings, sealed bearings, or a pre-adjusted design. Each option behaves differently under service.
Small details matter.
A torque wrench is essential. Clean contact surfaces matter too. Even a slight seating error can create uneven contact, excess heat, and premature noise. In real workshops, selection decisions are sometimes rushed because the old part looks similar. That approach deserves reconsideration. Part numbers, dimensions, and vehicle data should be verified through reliable catalogs or the original equipment manufacturer.
No selection method is perfect. Service history may reveal problems that a specification sheet cannot. Choose the Spindle Hub Bearing Assembly by combining engineering data, field evidence, and careful inspection. That balance supports safer operation, longer service life, and more dependable maintenance decisions.
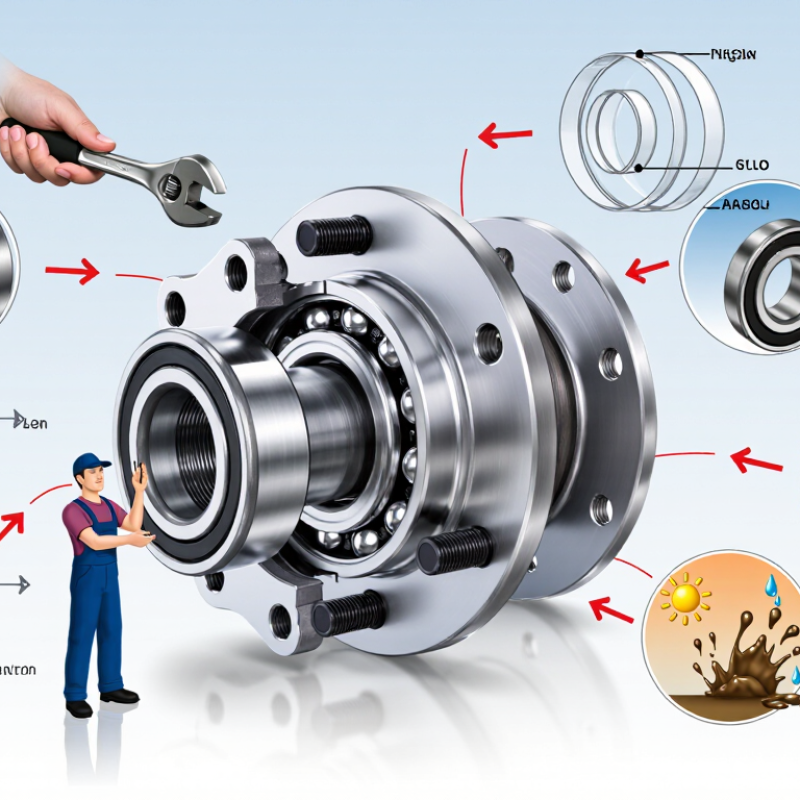
Choosing the right spindle hub bearing assembly starts with the bearing type, not its appearance. Ball bearings handle moderate radial loads and compact hub designs. Tapered roller bearings suit heavier loads and combined radial and axial forces. Inspect the old bearing for pitting, discoloration, or uneven wear. These marks often reveal overload or poor adjustment. Do not guess.
Measure the spindle diameter, hub bore, bearing width, flange thickness, and wheel stud spacing with accurate tools. Check the seal location and the ABS sensor clearance if the vehicle uses electronic wheel-speed monitoring. A nearly matching assembly can still create dangerous misalignment. Measure twice. Also compare the bearing’s inner and outer diameters with the hub and spindle seats. Small differences matter during installation.
Vehicle load requirements deserve equal attention. Check the axle rating, vehicle gross weight, cargo habits, and towing conditions. Cornering and braking create forces beyond the parked vehicle’s weight. Select a bearing with suitable dynamic and static load ratings, then verify the required preload or endplay. Follow the vehicle service manual for torque values and adjustment procedures. Over-tightening can generate heat; excessive looseness can damage the hub and spindle. In practical inspections, I have learned that clean seating surfaces matter as much as bearing selection. A little rust or debris can change the final fit. That detail is easy to overlook.
How to Choose the Right Spindle Hub Bearing Assembly?
Match Dynamic and Static Load Ratings Using ISO 281 and L10 Life
Selecting a spindle hub bearing assembly starts with real loading data, not catalogue capacity alone. Record radial load, axial load, rotation speed, shock, and operating temperature. A delivery vehicle turning on rough pavement may create brief loads far above its average wheel load. Those peaks matter.
Use ISO 281 to estimate basic rating life. For ball bearings, L10 equals (C/P)³ million revolutions. C represents the basic dynamic load rating, while P is the equivalent dynamic load. Roller bearings use an exponent of 10/3. Convert the result into operating hours using actual speed. The L10 value means 90% of identical bearings are expected to reach that life, not that every unit will.
Static capacity needs a separate check. Compare the basic static load rating, C0, with the equivalent static load, P0, using a suitable safety factor. ISO 76 provides the static-rating framework, while ISO 281 focuses on fatigue life. Include press-fit effects, misalignment, contamination, and lubrication changes. A calculation can still be wrong. I have seen designs pass L10 targets but fail after repeated shock because static margin was ignored. Recheck the loads at braking, cornering, and assembly. Use measured field data when possible. Estimates are useful, but they are not evidence.
Verify the fit before checking price or delivery time. Measure the spindle journal, hub bore, shoulder diameter, and axial seating depth. Compare every value with the manufacturer’s dimensional drawing. ISO 492:2014 defines bearing tolerance classes, but the assembly still depends on shaft and housing accuracy. A shaft that is only a few microns oversized may reduce internal clearance. That can create heat, drag, and premature damage.
Check operating clearance at the real temperature, not only on a workbench. Thermal expansion changes the fit between the inner ring, spindle, and hub. The manufacturer’s data should state radial clearance, recommended interference, speed limits, and allowable runout. Preload must also match the assembly design. Too little preload can produce vibration and raceway impact. Too much can raise torque quickly. Keep it measurable.
ISO 281:2007 defines L10 bearing life as the load life reached by 90% of identical bearings under stated conditions. That figure is useful, but it assumes correct mounting, lubrication, alignment, and cleanliness. In practice, dirt often ruins the calculation. I have seen a carefully selected bearing fail after one careless installation. Check tolerance stack-up with a micrometer, dial indicator, and calibrated torque tool. Recheck endplay after tightening. The first measurement may be wrong.
How to Choose the Right Spindle Hub Bearing Assembly?
Evaluate Speed, Temperature, Lubrication, and Sealing Performance
Choosing a spindle hub bearing assembly begins with operating evidence, not catalog dimensions. In workshop inspections, I record shaft speed, duty cycle, radial load, axial load, and ambient temperature. A spindle running at 3,000 rpm needs different internal clearance and grease behavior than one turning slowly. Check continuous and peak speed ratings. Leave margin for acceleration. Heat marks near raceways often signal excessive preload or insufficient lubrication. That clue matters. Do not rely on nominal RPM alone.
Temperature changes grease viscosity, seal elasticity, and internal clearance. Measure housing temperature after a full duty cycle, not after five quiet minutes. Select lubricant rated for expected heat, load, and speed. Mixing greases can cause separation or hardening, so confirm compatibility before service. Relubrication is not automatically safer. Too much grease can raise churning heat. I have seen a cool-running assembly become noisy after over-greasing. That mistake is easy to repeat.
Sealing performance deserves equal attention. Inspect lip contact, shield condition, and shaft finish. A seal that blocks water may create more friction at high speed. A low-friction shield may not suit abrasive dust or washdown areas. Match the seal to contamination, pressure, and temperature. Verify installation torque and preload with calibrated tools. Recheck endplay after installation. Paper specifications help, but field conditions remain imperfect. If noise, heat, or vibration changes, investigate before assuming the bearing is defective.
| Evaluation Dimension | Key Data to Check | Typical Engineering Reference | Recommended Verification Method | Selection Guidance |
|---|---|---|---|---|
| Operating Speed | Maximum continuous speed, peak speed, acceleration rate, and speed variation | Calculate the speed factor using n × dm, where n is rpm and dm is the bearing mean diameter in mm. Example: 10,000 rpm × 80 mm = 800,000 mm/min. | Compare the calculated speed factor with the bearing supplier’s grease- or oil-lubricated speed rating; perform a run-in and vibration test at operating speed. | Choose a bearing with a rated speed above the required continuous speed, preferably with a margin for acceleration, imbalance, and temperature rise. |
| Operating Temperature | Ambient temperature, ring temperature, housing temperature, heat from adjacent components, and thermal expansion | Standard bearing grease is commonly suitable for approximately -30°C to +120°C. High-temperature greases may support approximately +150°C to +180°C, depending on formulation and relubrication conditions. | Measure the outer-ring or housing temperature with a thermocouple during steady-state operation and during the highest expected load and speed condition. | Select seals, grease, cage material, and internal clearance for the highest sustained temperature, not only the average temperature. |
| Lubrication Method | Grease or oil, viscosity, base-oil type, fill quantity, relubrication interval, and compatibility | Grease is generally preferred for sealed, low-maintenance assemblies. Oil lubrication is more suitable for high-speed or high-temperature applications where heat removal is important. | Check lubricant viscosity at operating temperature, verify grease compatibility, and inspect torque, vibration, and temperature after lubrication. | Avoid overfilling. Excess grease can increase churning, torque, and heat. Use only compatible lubricants and follow the specified fill quantity. |
| Sealing Performance | Protection from dust, water, coolant, cutting fluid, and abrasive particles; seal friction and allowable speed | Non-contact shields generally produce lower friction and higher speed capability. Contact seals provide stronger contamination and moisture protection but may increase friction and temperature. | Perform dust, splash, or immersion testing as applicable; inspect leakage, ingress, seal wear, and temperature rise after testing. | Use contact sealing for wet or contaminated environments. Use lower-friction shielding only when the surrounding environment is clean and dry. |
| Radial and Axial Load | Radial load, axial load, moment load, shock load, and load direction | Calculate equivalent dynamic load using the applicable bearing rating method. For combined loading, both radial and axial components must be included. | Use actual duty-cycle loads, including acceleration, braking, cutting-force peaks, vibration, and impact events. | Select the internal arrangement and contact angle according to the dominant load direction. Do not size the bearing from static load alone when repeated rotation is involved. |
| Bearing Life | Required service hours, duty cycle, reliability target, load spectrum, and contamination level | For basic rating life, the commonly used relationship is L10 = (C/P)p, where p = 3 for ball bearings and p = 10/3 for roller bearings. | Calculate life using the complete duty cycle and then validate with endurance testing under representative contamination and temperature conditions. | Use a higher load rating, improved sealing, or better cleanliness when calculated life is insufficient. Rating life does not by itself account for every failure mode. |
| Runout and Stiffness | Radial runout, axial runout, preload, mounting rigidity, and shaft-to-housing alignment | Higher precision and correctly controlled preload generally improve rotational accuracy and stiffness, but excessive preload increases friction and operating temperature. | Measure runout with a calibrated dial indicator or displacement sensor and verify torque and temperature at operating speed. | Choose precision class and preload based on the required accuracy, rigidity, speed, and thermal behavior rather than selecting the tightest option by default. |
| Fit and Mounting | Shaft and housing tolerances, interference fit, shoulder geometry, clamping force, and installation method | Fit requirements depend on rotating-ring load, load magnitude, temperature difference, and material expansion. An incorrect fit can cause creep, excessive preload, or ring distortion. | Verify dimensional tolerances, mounting torque, axial position, and post-installation rotation torque. | Use controlled installation tools. Apply force only to the ring being fitted to prevent rolling-element damage. |
| Contamination Control | Particle size, moisture exposure, corrosive chemicals, cleanliness during assembly, and filtration where oil is used | Small hard particles can significantly reduce fatigue life. Clean assembly practices and effective sealing are often as important as the bearing’s nominal load rating. | Inspect lubricant and raceways, conduct particle or cleanliness analysis, and perform contamination or water-splash testing where required. | Prioritize sealing, clean handling, and suitable corrosion protection in dusty, wet, or chemically aggressive environments. |
| Noise and Vibration | Acceleration level, frequency spectrum, cage noise, imbalance, and structural resonance | Vibration may result from bearing defects, excessive clearance, insufficient or excessive preload, poor balance, misalignment, or inadequate lubrication. | Record vibration and acoustic data at no-load and loaded speeds, then compare results before and after thermal stabilization. | For precision spindles, evaluate bearing, shaft, housing, balance, and lubrication as one rotating system. |
| Maintenance and Serviceability | Expected maintenance interval, relubrication access, replacement time, inspection requirements, and total operating cost | Sealed-for-life assemblies reduce routine maintenance but require correct initial grease fill and seal selection. Relubricatable designs require controlled lubricant quantity and cleanliness. | Review maintenance records, temperature trends, vibration trends, and lubricant condition during planned inspections. | Select the assembly that meets the complete duty cycle with the lowest practical maintenance burden, not simply the lowest purchase cost. |
Installation torque is not a minor fitting detail. It controls preload, clamp force, and bearing clearance. Always use the vehicle or spindle manufacturer’s specified torque, tightening sequence, and angle procedure. A calibrated torque wrench is essential. Record the tool ID, date, and measured value. Hand tools can mislead.
Check runout at the hub flange and spindle journal with a clean dial indicator. ISO 1101:2017 defines geometric tolerances, but acceptable runout still depends on the assembly design. As a practical control, measure at several angular positions and rotate the hub slowly. Dirt under the flange can create false readings. It happens often. Recheck after final torque.
Endurance testing should match real loads, speed changes, temperature, and contamination exposure. ISO 281:2007 defines basic rating life, or L10 life, as the point where 90% of identical bearings are expected to survive under stated conditions. That figure is statistical, not a guarantee for every spindle. Test records should include vibration, temperature rise, grease condition, torque retention, and post-test clearance. Industry test practice often misses transient overloads. That gap deserves review. Compare measured results with ISO 492 dimensional accuracy requirements and your internal acceptance limits before approving the assembly.
Contact Us